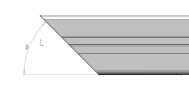
In this document, we will systematically present the steps required to mechanically assemble an aluminum profile frame with mitered cuts. The use of 45-degree miter cuts provides this frame with an aesthetically pleasing finish.
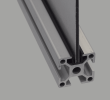
In this tutorial, we will incorporate a 5mm thick plexiglass (PMMA) sheet into the frame composed of aluminum profiles. Prior to this step, we will insert plastic framing profiles to secure the sheet in the grooves. Of course, it is possible to use different thicknesses and materials for the sheet, and the framing profiles will need to be adapted accordingly.
Furthermore, it is feasible to create the frame without incorporating a sheet.
The Systéal products used in this tutorial are as follows:
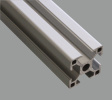
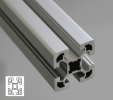
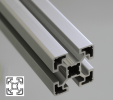
- 4x Aluminum profiles pre-cut to the desired length with optional 45-degree miter cuts.
- Plastic framing profiles: These plastic profiles are inserted into the grooves before placing the sheet, ensuring precise alignment. They can be easily cut to the required dimensions using a cutter.
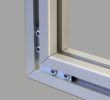
- 8x Internal L-shaped connectors for profile assembly.
- Plexiglass sheet: This sheet has been cut to the desired internal dimensions of the frame, with an additional 7mm on each side to facilitate easy insertion into the grooves. The extra dimension will depend on the chosen framing profile.
Required equipment:
- Mallet
- Allen wrench
- Cutter
Step 1: Pre-cut the framing profiles with a cutter to match the internal dimensions of the frame.
Step 2: Organize your equipment.

Step 3: Insert the framing profiles into the aluminum profiles.

Step 4: Shape the first part of the aluminum frame (U-shape).
For this step, use the lower profile of the frame, insert 2 internal L-shaped connectors, and then add the side profile.
Tighten the connector screws.
For an optimal visual appearance, eliminate any play between the mitered cuts by applying pressure during the screw tightening.
Repeat this procedure for the second side profile to form a U-shape.


Step 5: Insert the plexiglass sheet (or any other material according to your project).
Prior to this, we recommend removing any protective films (if present) from the edges of the sheet. This will make it easier to remove them later.
It is advisable to remove any protective films (if applicable) from the edges of the sheet to facilitate later removal.
Position your U-shaped frame vertically, then insert the sheet into the grooves.
If the framing profiles are difficult to insert, you can use a mallet and, if needed, glass cleaner to ease the sliding.
Ensure that the sheet fits snugly into the lower profile.


Step 6: Prepare the final profile by inserting the L-shaped connectors, then insert it into the U-shaped aluminum frame to close the frame.
This step may require the use of a mallet and, if necessary, glass cleaner.
Close the aluminum frame by tightening the L-shaped connectors, as in step 4.
You can now remove any protective films from the sheet if they are present.
The frame is now ready and completed.

You can remove any protective films from the sheet if they are present.
The frame is now complete.


